I blame every bit of misreading recipe and instructions to stress and a lot of sunshine and warm summer weather... Seriously, I don't know what got into me...
Number 1 - I think I took too much flour (not sure, though)
Number 2 - I rolled the dough thin ( a lot thinner than I was supposed to)
Number 3 - I came out with crumbly (not soft and not hard) shortcakes. So I'll put the cream and raspberries and rhubarb in the middle of two shortbread cookies
Hopefully I'll get a review from my hubby and his colleagues ;) - but don't bet your last dollar 'cause usually they just say: "It was good/fine/great" :D
Berry Shortcakes (makes 10 shortcakes) (or in my case, a lot more :))
2 pints blueberries or raspberries or a quart of strawberries (hulled and sliced) (I used raspberry and rhubarb)
4 teaspoons + 2 tablespoons sugar, divided
2 cups (8 ounces) pastry flour or (1 + 3/4 cups (7.5 ounces) unbleached all-purpose flour + 1/4 cup (1 ounce) cornstarch)
3/4 teaspoon salt
1 tablespoon baking powder
1 to 1 1/4 cups (8 - 10 ounces) heavy cream
1 to 2 tablespoons melted butter
coarse or sanding sugar, optional, for decorating the tops (I used green sand sprinkles, just because I could :))
1 pint heavy whipping cream
In a large bowl toss the berries with 2 tablespoons of sugar to let some of the juices come out. Cover and refrigerate.
Preheat the oven to 425 degrees F. Fit a large baking sheet with parchment paper.
In a medium mixing bowl, sift together the flour, salt, baking powder, and 2 teaspoons sugar.
Stir in enough heavy cream to moisten the dough thoroughly. When you squeeze the dough it should stay together without any dry pieces falling off.
Turn the dough out onto a lightly floured work surface and very gently pat it or roll it into an 8" circle about 3/4" thick.
Use a sharp biscuit cutter (2 - 2 + 1/3-inch) to cut into rounds. Combine the scraps and roll out again until you get 10 rounds.
Dip the rounds into melted butter, and place them on the prepared baking sheet. Sprinkle them generously with coarse sugar.
Bake the biscuits for 15 to 18 minutes until they're golden brown and puffy.
Meanwhile make the whipped cream. In the bowl of a stand mixer or in a large mixing bowl beat the whipping cream with 2 teaspoons sugar on medium-high speed until thick and stiff. When you lift the beater the cream should stick to it without falling off.
To serve split the shortcakes in half, top with whipped cream, a few spoons of the berries and the juice, more cream, the top biscuit, more whip cream and a few more berries.
So, as you see on the pics I just put cream and berries between 2 cakes...
Berry Shortcake - link to the founder of Baking Partner Challenge :)
Visar inlägg med etikett Baking Challenges. Visa alla inlägg
tisdag 15 juli 2014
onsdag 16 april 2014
Baking challenge - april
Sooo... I made the carrot cake and a Paleo carrot cake - I have also made chocolate babka buns, and will do a paleo version and post them later...
ORANGE CARROT CAKE with ORANGE CREAM CHEESE FILLING and PINEAPPLE CREAM CHEESE ICING
CAKE
4 eggs, room temperature
3 cups flour
2 teaspoons finely shredded orange peel
1 1/2 teaspoons baking powder
1/2 teaspoon salt
1/4 teaspoon baking soda
2 1/4 cups sugar
1 1/2 cups canola oil
1 teaspoon vanilla
1/4 cup spiced rum
1/2 cup golden raisins
2 cups finely shredded carrots
1 cup flaked coconut
1 - 11 ounce can mandarin orange sections, drained WELL and coarsely chopped
• Pour rum over raisins and set aside for at least an hour.
• Preheat oven to 350 degrees.
• Line pans with waxed paper and grease and flour the paper in 3-8 inch cake pans.
• In a large bowl sift together the flour, baking soda, orange peel, salt and sugar.
• In another bowl cream together the canola oil, vanilla and 1 egg. Add additional eggs and beat until well creamed.
• Add dry ingredients gradually until well blended.
• Fold in carrots and coconut blending well.
• Drain raisins and oranges WELL and fold in last.
• Spoon batter into prepared pans.
• "drop" pans to settle batter evenly.
• Bake 30-45 minutes or until toothpick comes out clean.
• Cool 10 minutes.
• Remove layers from pans and remove wax paper.
• Invert cakes onto rack and cool completely before assembling.
Because I like to use what I have at home at the moment, I used Bacardi Rum w/ coconut extract in stead of the Parrot Rum, and I substituted the mandarins w/ bits of orange
ORANGE CREAM CHEESE FILLING
6 ounces cream cheese, softened
1/2 cup orange marmalade
1/2 cup powdered sugar
• In a medium mixing bowl beat cream cheese until fluffy.
• Add orange marmalade and powdered sugar.
• Spread the filling between each layer.
PINEAPPLE CREAM CHEESE FROSTING
16 ounces cream cheese, softened
1/2 cup butter, softened
2 tablespoons pineapple juice
2 teaspoons pure vanilla extract
3 cups powdered sugar
• In a medium bowl beat cream cheese and butter until smooth.
• Add lemon juice and vanilla. Beat until blended.
• Add powdered sugar gradually until well blended and smooth.
• Ice first layer and then add 2nd cake top and ice again including sides of cake.
• Refrigerate 1 hour to set icing before serving.
Paleo Carrot cake recipe here
onsdag 19 mars 2014
March baking challenge goes Paleo
Hi y'all
Since I'm trying to find some new ways to stay healthy, I'm trying the Paleo lifestyle for a period of time... When it comes to adjusting your food there's both pros and cons... The pros are that I feel healthy, I don't starv myself, I don't go hungry and there are a lot of exciting recipes I can try (both main courses and desserts) :) On the downside comes the cost... Almond flour cost a lot more than APF and some of the other ingredients are not a staple in my house so it cost some money to fill my cupboard with the right stuff...
So... Enough is enough - here is the "original Cracker challenge recipe" followed by the one I made... Enjoy!
INGREDIENTS THAT ARE REPLACED WITH ORIGINAL:
· Vinegar (instead of cream of tartar)
· APF (instead of Pasta flour)
PREPARATION TIME: 20 minutes (excluding overnight refrigeration)
BAKING TIME: 10-12 minutes (I made them, like four batches)
YIELD: 40-45 crackers
INGREDIENTS REQUIRED:
· ¾ cup of all purpose flour
· Pinch of salt
· Pinch of Baking soda
· 2-3 drops of vinegar
· ½ tsp sugar
· ¼ cup lukewarm water
· 1 and ½ tsp active dry yeast
· 3 tbspn water
· 1 tbspn butter
· 1 tbspn oil
For the topping
· 1 tsp sea salt
· 1 tbspn dry herbs (You could also prefer any seasoning, or any specific herb)
METHOD:
Bring last three ingredients (water, butter and oil) to boil, in an vessel. Stir till butter is melted, keep aside. Cool them till they are lukewarm.
Mix yeast with lukewarm water and sugar, keep aside.
In an separate bowl, take the dry ingredients together like flour, salt, soda. To this add vinegar and gently mix through. Now add in yeast mixture, by making and well and mix. After yeast is mixed well, pour our lukewarm wet ingredients and mix to form a soft, sticky dough
Transfer this dough to an greased dry vessel and cover with an cling wrap. Refrigerate overnight.
After an overnight resting, dough wont double as such, but still an ‘little’ rise is okay. Bring this to room temperature and keep them over the working table dusting with excess of flour.
Fold them through left half vertically. Repeat the same through right side, till this resembles an ‘envelope’. Pre-heat the oven to 200 degree Celsius.
Turn them to 90 degree and start rolling. This folding and rolling is done, in order to get an flaky cracker, the ones you see in commercially known Britannia 50-50, Monaco etc.
I rolled them, till I got an very thin sheet. About, 34 *20 cm. You can forget about measurements, also the shape, here, but remember to get an very thin sheet.
I cut them horizontal and vertical lines, with 4 cm as an apt length for each of my salting cracker. Spread topping uniformly and press them with help of rolling pin under an baking sheet, in order to stick the topping over crackers.Cut them over the drawn line, place in baking sheet and make holes using grilling stick/toothpick. Be careful when you separate them, these crackers will be sticky.Bake them in pre-heated oven for ten to twelve minutes. Watch them closely, as they can easily burn or brown, remove from oven till edges are slightly brown and cool over wire rack completely.
GRAIN FREE PALEO ALMOND CRACKERS
Ingredients:
1 cup almond flour
1 egg white
1 pinch salt
(that's it!)
Preheat the oven to 325 degrees.
In a bowl, mix together the almond flour, egg white, and salt until it forms a paste.
Line a cookie sheet with parchment paper. Make sure you use parchment paper, because if you don't you'll end up chipping your crackers out of the pan. Place the dough in the middle and top with another piece of parchment paper. Using a rolling pin (or any other cylindrical instrument), roll out the dough as thin as you can get it. Try to make it take up the whole cookie sheet if you can. Super thin. I mean it!
Peel off the top layer of paper and score the dough with a knife into whatever size crackers you want. Bake in the 325 oven for 10 minutes and then check on the crackers. You are looking for them to color ever so slightly. A little color means crispy, but a lot of color means burned nut taste, which is no good. If the edges have started to color nicely, remove them to a plate and put the remaining crackers back in the oven. Keep doing this, checking every 5 minutes and removing the golden crackers, until finally they are all baked to perfection.
Cool completely and store in an airtight container.
You can make many variations on thee crackers by adding in different seasonings to the dough base. I used sea salt and poppy seeds.
söndag 23 februari 2014
Baking challenge february - Linzer cookies
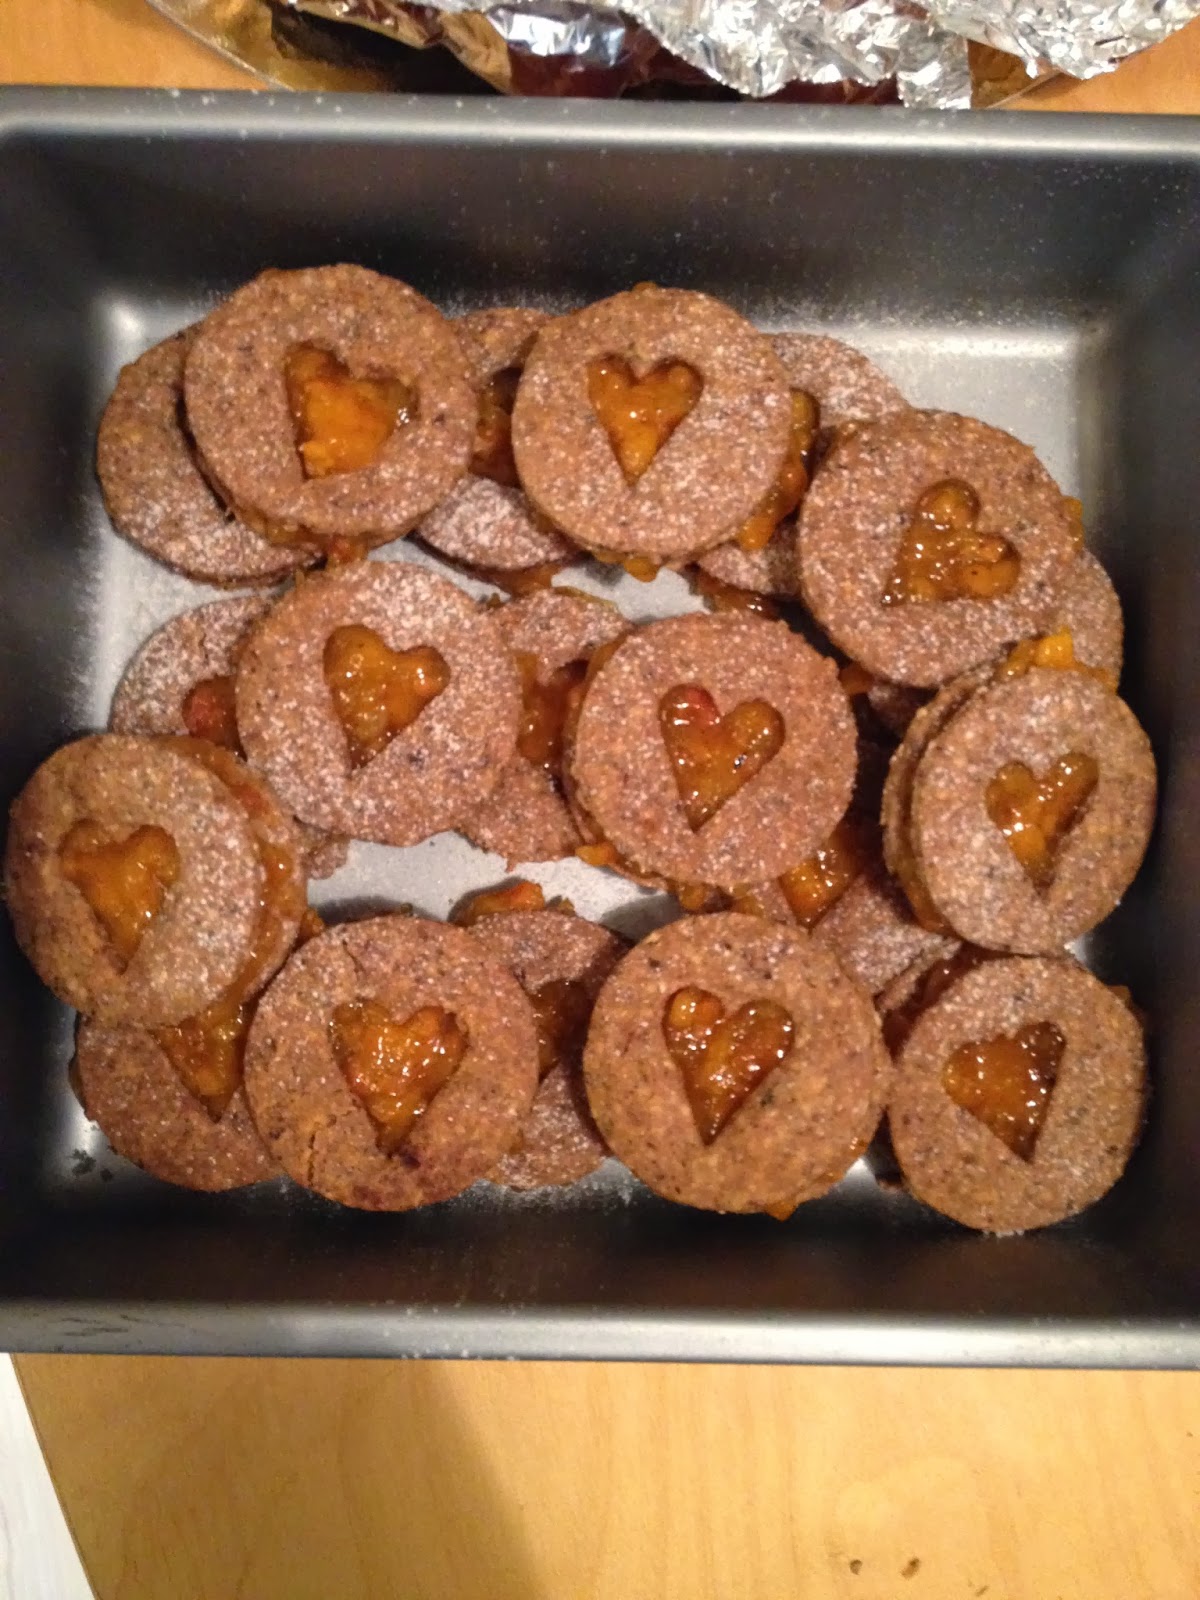
I made the Linzer cookies for this months challenge... I had homemade cloudberry jam at home, so that's what I used. The cookies are supposed to be light in colour, but I used only hazelnut flour, so they turned out a bit "rough".
Last months challenge I gave to my husband to take to work, this month I gave it to my dad, to take to his bridge evening :)
Makes about 40 2 inch cookies
1 cup 2 tablespoon (5.06 ounces)/145g unbleached all-purpose flour
1/2 cup (2.5 ounces) 63g ground almonds and/or hazelnuts
1/4 cup (1.75 ounces)/50g granulated sugar
1/8 teaspoon salt
1 1/4 teaspoons ground cinnamon
1/8 teaspoon ground cloves
8 tablespoon of unsalted butter
1/8 teaspoon almond extract
1 teaspoon grated lemon zest or 1/4 teaspoon lemon extract
1 teaspoon grated orange zest or 1/4 teaspoon orange extract
Strained or pureed good quality preserves or fruit spread
1 teaspoon + extra Powdered sugar for dusting
Equipment:
Cookie sheets, lined with parchment paper
Food processor
Large and small cookie cutters of the same or a different shape, such as a 2-inch square and
a ¾ inch square
Directions,
Blanch almond and make powder with 1 teaspoon of powdered sugar like this.
In a bowl of kitchen aid stand mixer combine the flour, ground nuts, granulated sugar, salt, cinnamon, cloves , almond extract and the lemon and orange zests or extracts . Then add the butter (cut into several pieces if firm) mix well until mixture looks damp and crumbly. Continue mixing until all the dough comes together. Remove the dough, press it into a ball, and knead it a few times to be sure all of the dry ingredients are blended into the dough.
Form the dough into 1 flat patty. Wrap and refrigerate the dough for at least 2 hours and preferably overnight or up to 3 days. The dough may be frozen for up to 3 months.
When you are ready to bake. Preheat the oven to 325°F. Position racks in the upper and lower thirds of the oven.
To Roll and Cut Cookies:
Remove dough from the refrigerator and let it sit at room temperature until supple enough to roll but still quite firm. It will continue to soften as you work. Roll the dough to a thickness of 1/8 inch between sheets of wax paper or between heavy plastic sheets cut from a plastic bag. Turn the dough over once or twice while you are rolling it out to check for deep wrinkles; if necessary, peel off and smooth the paper or plastic over the dough before continuing to roll it. When the dough is thin enough, peel off the top sheet of paper or plastic and keep it in front of you. Invert the dough onto that sheet and peel off the second sheet.
Cut as many large shapes as possible. Dip the edges of the cookie cutters in flour as necessary to prevent sticking. Cut a smaller shape from the center of half of the large shapes. Use the point of a paring knife to lift and remove scraps as you transfer the cookies to the lined pans. Place large cookies at least 1 1/2 inches apart on the cookie sheets. If the dough gets too soft at any time-while rolling, cutting, removing scraps between cookies, or transferring cookies-slide a cookie sheet underneath the paper or plastic and refrigerate the dough for a few minutes, until firm. Repeat with the second piece of dough. Gently press all of the dough scraps together (don't overwork them with too much kneading) and reroll.
Bake for 15 to 25 minutes , or until the cookies are just beginning to color at the edges. Rotate the pans from top to bottom and from front to back halfway through the baking time to ensure even baking. (The small shapes may be baked for 8 to 10 minutes on a separate cookie sheet to make miniature cookies, or the dough may be combined with other dough scraps to be rerolled and cut.)
Let the cookies firm up on the pan for 1 to 2 minutes. For lined pans, set the pans or just the liners on racks to cool; for unlined pans, use a metal spatula to transfer the cookies to racks. Cool the cookies completely before stacking or storing. The cookies are delicious fresh but even better the next day. May be kept in an airtight container for a month or more.
To assemble, shortly before serving, spread each solid cookie with a thin layer of preserves. Sift powdered sugar over the cookies with cutouts. Place a sugared cutout cookie on top of each preserve-covered cookie.
Leftover cookies can be stored in an airtight container, but the moisture from the preserves will soften them
fredag 17 januari 2014
Baking Challenge January
My husband and his friends at work ate this yesterday, with some whipped cream, grated dark chocolate and Rum...
This month we have tried a Dutch recipe - suggested and tried by Kaveri of Palakad Chamyal.
Traditional Dutch Apple Pie (Appletaart)
Recipe Source: The Dutch Table (http://www.thedutchtable.com/2010/01/appeltaart-dutch-apple-pie.html)
For the crust/base
All Purpose Flour – 2 cups
Butter – 175 g
Sugar – ¾ cup
Milk – 4 tbsp, cold
For the filling
Tart Apples (Elstar/Babern/Granny Smith) – 2 big
Lemon Juice – 1 tbsp
Raisins soaked in apple juice (next time I will try soaling them in Rum :)) – 1 cup
Speculass Spices (recipe further down) – 1 tbsp
Cream of Wheat/Semolina/Rava – 2 tbsp
Sugar – ¼ cup (See notes)
White Bread – 2 slices
How-to-do-it
1. Mix the flour with the sugar, salt and cut in the butter. Rub gently and quickly with your hands. It is ok to have pea sized pellets.
2. Add the cold milk 1 tbsp at a time and knead into a dough.
3. Do not work too much with hands. Do the kneading quickly.
4. Refrigerate the dough at least for half an hour or until the dough is firm and pliable.
5. Get the filling ready,
6. Peel and core the apples.
7. Cut the apples and slice them. Don’t make them small. They have to be big slices.
8. Toss them with the rest of the ingredients, except the bread and set aside.
9. Grease and dust a springfoam pan. (I used an 8 inch pan)
10. Take the dough out of the refrigerator, keep aside 1/5th of the dough.
11. Press the remaining dough onto the base and ¾ the height of the sides of the springform pan.
12. Cut the edges of the bread and cut them into small cubes. Place these bread cubes all over the base.
13. Now add in the apple raisin mixture, press lightly to fit in.
14. Now, to do the lattice,
15. Take out ¼ th of the dough that has been kept aside,
16. On a lightly floured surface, roll out the dough and cut into strips.
17. Place 3 strips from one end to the other, and the remaining 3 strips crossing over the previously laid strips.
18. With the last bit of dough, roll into a rope like and place around the circumference of the pie.
19. Brush the top with milk and sprinkle some sugar.
20. Bake at 350 F (175°C) for 75 minutes.
Notes:
I have skipped the eggs in the recipe. Feel free to follow the original recipe with eggs.
I felt that the apples I used were too tart, and the sweetness of ¼ cup was slightly on the lesser side. Taste the filling and feel free to increase or decrease the sugar depending on the tartness of apples.
The speculaas spice mix:
15 grams cinnamon
5 grams cloves
5 grams nutmeg
2 grams white pepper
2 grams coriander seed
2 grams aniseed
tisdag 17 december 2013
Baking Challenge December
I tripled the recipe and made it a round large cake - originally I think it should be the shape of a wooden log :D
Sorry for just copying the recipe - I seriously doesn't have the time to make it myself...
French Yule Log by Flore of Florilège Gourmand
There are six components to the yule log which can be made over the course of 3 days.
DAY 1: praline feuillete and crème brûlée
praline feuillete (preparation time: 10 min)
3.5 oz. (100g) milk chocolate
praline feuillete (preparation time: 10 min)
3.5 oz. (100g) milk chocolate
-
1 2/3 tablespoons (25g) butter
-
2 tablespoons (1 oz./30g) praline (I used hazelnut butter with 1 tsp sugar added)
-
Melt the chocolate and butter in a double boiler.
-
Add the praline and the coarsely crushed lace crepes. Mix quickly to thoroughly coat with the
chocolate.
-
Spread between two sheets of wax paper to a size slightly larger than your desired shape.
-
Refrigerate until hard.
vanilla crème brûlée (preparation time: 15min + 1h infusing + 1h baking)
Note: The vanilla crème brûlée can be flavored differently by simply replacing the vanilla with
something else e.g. cardamom, lavender, etc...
1/2 cup (115g) heavy cream (35% fat content)
1/2 cup (115g) whole milk
4 medium (72g) egg yolks
0.75 oz. (2 tbsps/25g) granulated sugar
1 vanilla bean
4 medium (72g) egg yolks
0.75 oz. (2 tbsps/25g) granulated sugar
1 vanilla bean
-
Heat the milk, cream, and scraped vanilla bean to just boiling.
-
Remove from the stove and let the vanilla infuse for about 1 hour.
-
Whisk together the sugar and egg yolks (but do not beat until white).
-
Pour the vanilla-infused milk over the sugar/yolk mixture. Mix well.
-
Wipe with a very wet cloth and then cover your baking mold (whatever shape is going to fit
on the inside of your Yule log/cake) with parchment paper. [Jen's note: this doesn't work and
I agree from past experience]
-
Pour the cream into the mold and bake at 300°F for about 1-1.5 hours in a water bath or until
firm on the edges and slightly wobbly in the center.
-
Let cool and put in the freezer for at least 1 hour to firm up and facilitate the final assembly.
DAY 2: dacquoise, ganache and mousse
dacquoise biscuit (almond cake) (preparation time: 10 min + 15 min for baking)
equipment: 2 mixing bowls, hand or stand mixer with whisk attachment, spatula, baking pan such as a 10”x15” jelly-roll pan, parchment paper.
Note: You can use the dacquoise for the bottom of your yule log only, or as bottom and top layers, or if using a yule log mold (half-pipe) to line your entire mold with the biscuit. Take care to spread the dacquoise accordingly. Try to bake the dacquoise the same day you assemble the log to keep it as moist as possible.
2.8 oz. (3/4 cup + 1 tbsp/80g) almond meal
1.75 oz. (1/2 cup/50g) confectioner’s sugar
2 tablespoons (15g) all-purpose flour
3.5 oz. (100g/100ml) about 3 medium egg whites
1.75 oz. (4 tbsp/50g) granulated sugar
3 oz. heavy cream
dacquoise biscuit (almond cake) (preparation time: 10 min + 15 min for baking)
equipment: 2 mixing bowls, hand or stand mixer with whisk attachment, spatula, baking pan such as a 10”x15” jelly-roll pan, parchment paper.
Note: You can use the dacquoise for the bottom of your yule log only, or as bottom and top layers, or if using a yule log mold (half-pipe) to line your entire mold with the biscuit. Take care to spread the dacquoise accordingly. Try to bake the dacquoise the same day you assemble the log to keep it as moist as possible.
2.8 oz. (3/4 cup + 1 tbsp/80g) almond meal
1.75 oz. (1/2 cup/50g) confectioner’s sugar
2 tablespoons (15g) all-purpose flour
3.5 oz. (100g/100ml) about 3 medium egg whites
1.75 oz. (4 tbsp/50g) granulated sugar
-
Finely mix the almond meal and the confectioner’s sugar. (If you have a mixer, you can use it
by pulsing the ingredients together for no longer than 30 seconds).
-
Sift the flour into the mix.
-
Beat the eggs whites, gradually adding the granulated sugar until stiff.
-
Pour the almond meal mixture into the egg whites and blend delicately with a spatula.
-
Grease a piece of parchment paper and line your baking pan with it.
-
Spread the batter on a piece of parchment paper to an area slightly larger than your desired
shape (circle, long strip etc...) and to a height of 1/3 inches (8mm).
-
Bake at 350°F (180°C) for approximately 15 minutes (depends on your oven), until golden.
-
Let cool and cut to the desired shape.
dark chocolate ganache (preparation time: 10min)
3 oz. heavy cream
-
Place chocolate in a bowl.
-
Heat the cream in a saucepan until just boiling.
-
Remove from heat and pour over dark chocolate and let sit for a minute. Stir until smooth and
silky.
-
Pour onto parchment and let cool or set in a refrigerator.
dark chocolate mousse (preparation time: 15 min)
10.5 oz. bittersweet chocolate, coarsely chopped 2 large eggs, room temperature
5 large egg yolks, room temperature
2/3 cup sugar
3 tablespoons water
2 cups heavy cream
10.5 oz. bittersweet chocolate, coarsely chopped 2 large eggs, room temperature
5 large egg yolks, room temperature
2/3 cup sugar
3 tablespoons water
2 cups heavy cream
-
Melt the chocolate in a microwave at half power for 30 seconds at a time, stirry after every
30 second interval until just melted.
-
Pour chocolate in a bowl large enough to hold all ingredients and set aside until cooled to
room temperature.
-
Place eggs and yolks in a mixer with balloon whisk and whip for 1 minute.
-
Put the sugar and water in a small saucepan and stir to moisten the sugar. Bring to a boil until
temperature reaches 44°F (227°F for 8500 ft. elevation).
-
Remove from heat.
-
Start beating the eggs again on medium speed and slowly and steadily pour the sugar syrup,
pouring down the center, not on the side of the bowl or on the whisk attachment. When all of the syrup is added, increase speed to high and beat until eggs pale, triple in volume, and cool to room temperature.
-
In a large bowl, whip the heavy cream to medium peaks. Fold a quarter of the cream into the
cooled chocolate. Fold in remaining cream, followed by egg mixture.
-
Try not to deflate the batter too much.
DAY 3: glaze
dark chocolate icing (glaze) preparation time: 25 min (10 min if you don’t count softening the gelatin)
Note: Because the icing gels quickly, you should make it at the last minute.
Jen’s Note: I made twice as much as the amount listed below.
4g or 1/2 tbsp powdered gelatin or 2 sheets gelatin 1/4 cup (60g) heavy cream (35% fat content)
2.1 oz. (5 tbsps/60g) granulated sugar
1/4 cup (50g) water
1/3 cup (30g) unsweetened cocoa powder
-
Soften the gelatin in cold water (about 1/4 cup of water for 1 tablespoon of powdered
gelatin) for 15 minutes.
-
Boil the rest of the ingredients and cook an additional 3 minutes after boiling.
-
Add gelatin to the chocolate mixture. Mix well.
-
Pour through a fine sieve.
-
Let cool while checking the texture regularly. As soon as the mixture is smooth and coats a
spoon well (it is starting to gel), use immediately.
ASSEMBLY
Note: You will want to tap your mold gently on the counter top after each time you pipe mousse in
to get rid of any air bubbles.
-
Line your mold or pan with rhodoid (clear hard plastic, I usually use transparencies cut to the
desired shape, it’s easier to find than cellulose acetate which is what rhodoid translates to in
English) OR plastic film. Rhodoid will give you a smoother shape but you may have a hard time
using it depending on the kind of mold you’re using.
-
Pipe one third of the mousse component into the mold.
-
Take the crème brûlée insert out of the freezer at the last minute and set on top of the
mousse.
-
Press down gently to slightly ensconce it in the mousse.
-
Pipe second third of the mousse component around and on top of the crème brûlée.
-
Cut the feuillete to a size slightly smaller than your mold so that it can be surrounded by
mousse.
-
Lay it on top of the mousse you just piped into the mold.
-
Pipe the last third of the mousse component on top of the feuillete.
-
Freeze for a few hours to set.
-
Take out of the freezer.
-
Pipe the ganache onto the frozen mousse leaving a slight edge so that ganache doesn’t seep
out when you set the dacquoise on top.
-
Close with the dacquoise.
-
Freeze OVER NIGHT.
-
Unmold the cake/log/whatever and set on a wire rack over a shallow pan.
lördag 16 november 2013
Pataquetas Baking Partner Challenge
I’m glad to present this traditional bread from Valencia, known at least since the Seventeenth Century. The Pataqueta, diminutive for "pataca" has the shape of a crescent Moon. This is the bread the inhabitants of the Valencia’s Orchard used to eat when they went to work. It was firstly baked in the Moorish oven they have in their Barraca and then in wood stoves.
Nowadays, it is not frequently baked and people book it in advance to get one. “Pataquetas” are usually baked for our main important festival, “Fallas”. Most of Valencia’s bakers are asked to bake “pataquetas” every year in March.
Ingredients:
For the ferment:
You will need
100 ml water
50 g allpurpose flour
12.5 g fresh yeast / 5g or 1 ½ tsp Instant yeast / 6.25g or 2tsp active dry yeast
1/2 teaspoon sugar
Bread dough:
You will need
450 g/3 cup all purpose flour
200 ml tepid water
10 g/1 ¾ teaspoon fine sea salt
all the ferment
a little flour for dusting the work surface and the bread.
Directions
Ferment
Stir the yeast into the water in your mixing bowl, then add the flour and sugar and mix well. Cover with plastic film.
Put into the fridge overnight or up to 48 hours.
Bread dough
- Keeping the ferment in its bowl, add the rest of the ingredients except the salt, and mix together with your scraper.
- When everything starts to come together into dough, turn it out onto your work surface (don’t flour it first).
- Start to work the dough for about 10 minutes, then add the salt and continue kneading until smooth and elastic. In this process, I’ve used my bread machine.( You can also knead by hand or use stand mixer)
How to shape Pataquetas
Nowadays, it is not frequently baked and people book it in advance to get one. “Pataquetas” are usually baked for our main important festival, “Fallas”. Most of Valencia’s bakers are asked to bake “pataquetas” every year in March.
Ingredients:
For the ferment:
You will need
100 ml water
50 g allpurpose flour
12.5 g fresh yeast / 5g or 1 ½ tsp Instant yeast / 6.25g or 2tsp active dry yeast
1/2 teaspoon sugar
Bread dough:
You will need
450 g/3 cup all purpose flour
200 ml tepid water
10 g/1 ¾ teaspoon fine sea salt
all the ferment
a little flour for dusting the work surface and the bread.
Directions
Ferment
Stir the yeast into the water in your mixing bowl, then add the flour and sugar and mix well. Cover with plastic film.
Put into the fridge overnight or up to 48 hours.
Bread dough
- Keeping the ferment in its bowl, add the rest of the ingredients except the salt, and mix together with your scraper.
- When everything starts to come together into dough, turn it out onto your work surface (don’t flour it first).
- Start to work the dough for about 10 minutes, then add the salt and continue kneading until smooth and elastic. In this process, I’ve used my bread machine.( You can also knead by hand or use stand mixer)
- Divide dough into 150 g pieces and then form the dough into small balls, cover with a baking cloth and leave to rest for 20 minutes or until them double in size.
- Flatten with the palm of the hand, putting more pressure on the edges of the dough to get a rounded shape.
- Then with a sharp knife or baker scraper make a cut in and cut open from the outside. Flatten the ball and mark the cut above.
- Place them on a baking tray and cover them again with a kitchen cloth dusted with flower.
- Leave to rest until them double in size, for about 1 hour.
- Preheat the oven to 200º C / 392 F
- Make two cuts on the bottom before baking.
- Sprinkle a little fine flour using a sieve or strainer.
- Bake with steam, 30 minutes at 200 °C / 392 F
- Cool on a wire rack.How to shape Pataquetas
Etiketter:
Baking Challenges,
bröd
söndag 15 september 2013
Baking Challenge september - Kronut
Kronut - baking partner challenge september
I have tried making Kronuts (something I have never heard of before). The original is from New York, the man who invented it has even trademarked the original name "Cronut"
I did the recipe suggested to me (with help from my mum - because I didn't have the time to make all the steps on my own)
Kronuts
Makes around 16 big ones, we made about 30 smaller ones
Ingredients
For dough
510grams all purpose flour more for dusting the work table
7g salt
100g sugar
150g milk (I used 1.5% milk)
2 ¼ teaspoons active dry yeast
2 jumbo eggs (If you are using large eggs use 3)
50g butter
For butter layer
300grams butter
For frying
Canola oil: 2-4 cups
Water: 200 g for brushing on the top
Cinnamon sugar (400g sugar and 100 g cinnamon)
Directions
Make the dough on day number ONE
Incorporate the butter into the dough on day number TWO
Fry the dough on day number THREE
DAY ONE
Making the dough:
30 minutes before starting making the dough, take out butter and eggs from the fridge, in order to make them room temperature. Combine the dry ingredients (flour, salt, instant active yeast) in a mixer bowl.
Microwave the milk on high for 30 seconds and add butter in order to make the butter melt properly.
Add the butter-milk mixture to the dry mixture. Mix on low speed for about 3 minutes, and then on higher speed for another 8 minutes (don't do like I did, use the proper dough "whisk", which I forgot :S)Then to the dry mixture add butter milk mixture and eggs. Mix on low speed for 3 minutes, or until everything is incorporated. Mix on higher speed for another 8 minutes.
Remove the dough from the mixer bowl form a ball by tucking the edges on the dough. Coat another bowl with any oil of your choice and place the dough in it with seams down. Use a knife to cut a cross into top surface (this will help the dough relax). Cover tightly with clear plastic wrap on top the bowl, making sure it is in not contact with the dough (spray the inside of the plastic wrap with oil too, just in case :)).
Place dough in a warm area and allow it to double in size. This takes about 60 minutes. Once dough has doubled in size transfer the bowl to refrigerator overnight.
DAY TWO
Start incorporating the butter into the dough.
Cut the cold butter 295g lengthwise into 1/2-inch-thick slabs. Arrange the pieces on a piece of parchment or waxed paper, so they can form a 5- to 6-inch square (when you are done rolling), cutting the butter crosswise as necessary to fit. Top with another piece of parchment or waxed paper. With a rolling pin, pound the butter with light, even strokes. As the pieces begin to adhere, use more force. Pound the butter until it’s about 4 x 6 inches square and then trim the edges of the butter. Put the trimmings on top of the square and pound them in lightly with the rolling pin. Place in refrigerator to cool for at least 2 hours.
Laminate the dough
Unwrap and lay the dough on a lightly floured work surface. Roll into a 10-1/2-inch square. Brush excess flour off the dough. Remove the butter from the refrigerator. If it's not cold enough, refrigerate a bit longer. Unwrap and place the butter on the dough so that the points of the butter square are centered along the sides of the dough. Fold one flap of dough over the butter toward you, stretching it slightly so that the point just reaches the center of the butter. Repeat with the other flaps. Then press the edges together to completely seal the butter inside the dough. (A complete seal ensures butter won’t escape.).
1st turn
Lightly flour the top and bottom of the dough. With the rolling pin, firmly press the dough to elongate it slightly and then begin rolling instead of pressing, focusing on lengthening rather than widening the dough and keeping the edges straight. Turn the dough so that a shorter end faces you. Roll to expand the length of the dough, making sure that the dough doesn’t stick to the table. Add flour if needed. When you have a rectangle about 21 x 9 inches, fold the top third of the rectangle down and fold the bottom third up to cover it. Turn the dough 90 degrees so that the opening resembles a book.
2nd Turn.
Try to do this turn right away, but if the dough is too warm, wrap in film and place in the refrigerator until it cools. Repeat rolling, just like the first turn, then turn 90 degrees and gently press two fingers into the lower right corner to mark the number of turns. (Marking the dough allows you to track your progress, and ensure that the orientation of the dough is correct when you remove it from the refrigerator.) Cover the dough in a parchment paper and then again with plastic wrap and refrigerate for at least 1 hour.
3rd Turn.
The dough will be hard, so gently pound the dough to warm the butter. If it is too cold the butter will separate and not spread as it should. Repeat the previous steps, and turn again, marking the corner with three fingerprints. Cover dough with parchment paper and plastic wrap and refrigerate for 1 hour.
4th Turn.
Make the final turn, repeating the steps from turns 1-3. Refrigerate overnight
DAY THREE
Frying
Roll out the Dough. Lightly dust a work surface with flour and roll out the dough to approximately the size of a sheet pan, 1/2 inch thick. Make sure the dough stays cold, without sticking to the surface. If it starts to stick, place in the refrigerator and roll again when cool. Transfer to a sheet pan with parchment paper, film and chill before use.
Punching out Kronuts. Prepare a sheet pan with parchment paper, sprayed with PAM or oil . Remove dough from fridge and take two ring molds, approximately outer molds should be 3 ½ inch and inner should be 1 ½ inch (I made them a lot smaller though) Only start punching if the dough is very cold. Otherwise, your Kronut won’t fry like you want it to.
Transfer half of the punched Kronuts to the sheet pan, leaving room for kronuts to raise a bit.
Brush tops of the Kronut with water and set aside. Place Kronut holes on the same sheet tray, leaving enough space for them to raise without sticking to each other. Leave in a warm area until they have raised, about 30 min.
Once it is raised, keep it in the refrigerator for 1 hour or in the freezer for 15 minutes before frying.
Frying Kronuts.
Heat canola oil in a pot, about 3 inches high. Test oil with a pinch of flour: if flour foams it is ready for deep frying. Turn heat to low and place Kronuts in oil, 1-2 at a time, in order to avoid overcrowding the pot. Turn and flip Kronuts often so that they brown evenly.
Once golden brown throughout, test one to see if it is cooked all the way through. Remove and place on paper towels.
Now is a good time to prepare the Glaze
Once it is no longer shiny transfer to a container with sugar and cinnamon and toss.
Enjoy
(I stuffed the Kronuts with vanilla custard and did not use a Glaze (but I will the next time))
Next time I will also try this with the dough that is used to make "danish pastry" - because that dough only takes one day to prepare :)
Important notes to Remember
Don’t overwork the dough with too much kneading,
Don’t overwork the butter, if butter starts to leaking, try to put it back in the refrigerator.
Flour the area well so that the dough won’t stick
Heat oil in medium temperature and fry the Kronuts in low temperature otherwise the outside becomes too dark to soon and the inside won’t cook properly.
Filling and glaze - find your favourite :)
For pastry cream and filling, suggested by Cinnamon spice and everything nice
Pastry cream is one of the building blocks of a great dessert. Delicious as is, it can also be flavored in an almost infinite number of ways to create the perfect touch for your cake, pie, or pastry. Make sure you have all of your ingredients and equipment on hand before you begin; once the egg yolks begin to cook, they won't wait for you to find your strainer! This base recipe calls for 1/2 cup of sugar, which makes a pastry cream that's just barely sweet. If you're planning to use the pastry cream for a pie filling and you want it to be sweeter, increase the sugar to 3/4 cup.
Pastry Cream
3 cups whole milk
1/2 cup sugar
1/4 teaspoon salt
2 teaspoons vanilla extract or Vanilla Crush; or 1/2 vanilla bean, slit lengthwise
1/4 cup cornstarch
1 tablespoon King Arthur Unbleached All-Purpose Flour
4 large egg yolks
1/4 cup (1/2 stick) butter
1 cup heavy cream, whipped to soft peaks
Directions
1) In a medium-sized saucepan, stir together 2 1/2 cups of the milk, the sugar, salt, and the vanilla bean. (If you're using vanilla extract or Vanilla Crush, add it at the end.) Bring to a simmer over medium heat, stirring to dissolve the sugar.
2) Meanwhile, whisk the cornstarch, flour, and egg yolks with the remaining 1/2 cup milk.
3) Whisk some of the hot milk mixture with the egg yolks to temper them. This keeps the yolks from turning to scrambled eggs when you add them to the simmering milk.
4) Pour the egg/milk mixture back into the remaining simmering milk. Doing this through a strainer will help prevent lumps later. Bring to a boil, stirring constantly with a whisk, until the mixture thickens.
5) Remove from the heat and strain through a fine sieve. Stir in the butter and vanilla extract (if you're using it). If you're going to flavor the pastry cream with chocolate or some other flavor, this is the time to do it (see variations below).
6) Rub a piece of butter over the surface of the cream, top with a piece of plastic wrap (make sure it touches the top of the pastry cream so it doesn't develop a skin), then refrigerate until cool.
7) To complete, fold the whipped cream into the cooled pastry cream.
Variations:
Butterscotch Pastry Cream: Add 1/4 teaspoon butter-rum flavor and/or 1 cup (6 ounces) butterscotch chips to the pastry cream after straining, stirring until the chips have melted.
Caramel Pastry Cream: Add 3/4 cup chopped caramel (7 1/2 ounces, or 21 to 23 unwrapped individual caramels) to the hot, strained pastry cream, stirring until melted and the mixture is smooth.
Chocolate Pastry Cream: Add 1 cup (6 ounces) chopped chocolate to the hot, strained pastry cream, stirring until melted and the mixture is smooth.
Hazelnut Pastry Cream: Omit the butter and increase the sugar to 3/4 cup (5 1/4 ounces). Add 3/4 cup (8 1/4 ounces) praline paste to the hot, strained pastry cream, stirring until combined.
Orange Pastry Cream: Increase the sugar to 3/4 cup (5 1/4 ounces). Add 1 teaspoon orange extract; 1/4 teaspoon orange oil; or 3 tablespoons orange zest to the hot, strained pastry cream.
Peanut Butter Pastry Cream: Add 3/4 cup (7 1/4 ounces) smooth peanut butter to the hot pastry cream, stirring until melted and the mixture is smooth. If you're using a natural or freshly-made peanut butter, omit the butter from the recipe, or the pastry cream will be greasy.
Pistachio Pastry Cream: Omit the butter and increase the sugar to 3/4 cup (5 1/4 ounces). Add 3/4 cup (8 1/4 ounces) pistachio paste, or blanched pureed pistachio meats.
Glazes from King Arthur Flour
Easy Vanilla Glaze
1 1/4 cups confectioners' sugar or glazing sugar, sifted to remove any lumps
1 tablespoon light corn syrup
1 tablespoon melted butter
1 to 2 tablespoons milk or water
1/2 teaspoon vanilla extract
Chocolate Glaze
1/2 cup semisweet chocolate chips
2 tablespoons butter
1 tablespoon plus 1 teaspoon light corn syrup
1/4 teaspoon vanilla extract
Apple Cider Glaze
2 tablespoons bottled boiled cider
1 tablespoon heavy cream
1 cup confectioners' or glazing sugar
Directions
1) To make the vanilla glaze: Stir the ingredients together, adding extra liquid or confectioners' sugar to adjust the consistency as needed. Yield: about 1/2 cup glaze.
2) To make chocolate glaze: Melt the ingredients together over low heat or in the microwave, stirring often. Add extra corn syrup if needed to make a smooth, shiny glaze. Yield: about 1/2 cup glaze.
3) To make apple cider glaze: Stir all of the ingredients together, adding additional sugar or cream if needed to make the glaze the consistency of molasses. Dip top of doughnuts in glaze, or drizzle glaze over doughnuts. Yield: about 1/2 cup glaze.
Prenumerera på:
Inlägg (Atom)